Ombre Pinecones

Lisa from A Bride on a Budget came up with a fun and easy wintertime craft. Ombre painted pine cones! Lisa gathered her pinecones from outside, so that part was completely free.

pine-cones

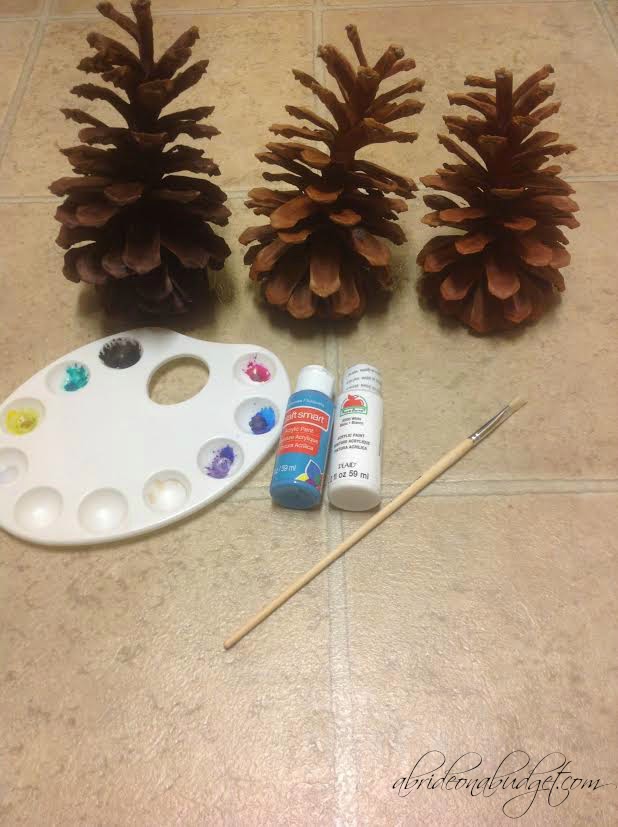
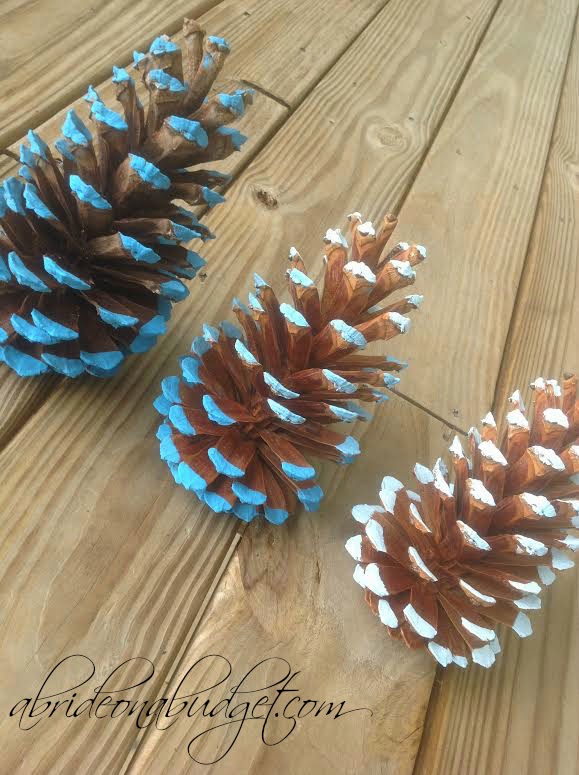
Before she started painting, Lisa made sure she’d prepped her pine cones so that they wouldn’t introduce any tiny travelers into the house. She chose several pretty shades of blue craft paint, and went to work brushing paint on to the tips of each cone. Lisa started with a darker shade of blue on the bottom of the cone, then worked her way upwards using lighter shades of blue as she went to achieve the ombre effect. Don’t they look great?

ombre-painted-pinecones

Stop by A Bride on a Budget to get all the details on this winter craft with pinecones.

DIY Ottoman Makeover

At her blog, Tiny Sidekick, Corey shares an upholstering project. Corey’s mom had a comfy, round ottoman that had started looking a little shabby and didn’t go with her current decor. She asked Corey to help give it a new look.

blue-round-ottoman

Corey and her mom decided to reupholster the ottoman with new, stylish fabric. They removed the existing upholstery and used it as a template for cutting and sewing the new upholstery. Despite a few glitches along the way, their hard work really paid off! The “new” ottoman looks soooo good!

blue-round-ottoman-makeover

Get some re-upholstering tips from Corey by clicking over to Tiny Sidekick .

Soup Can Super Bowl Deco

Just in time for this weekend’s big game, here’s some upcycled decor from Drugstore Divas. They created a foot-ball themed utensil holder from an empty soup can!

empty-soup-can

The divas started out with your basic can of soup. After washing it and removing the label, they cut some thick, high-quality brown paper to fit around the can. Lines of white paper glued onto the brown mimic the classic football stitch. The paper was attached with hot glue to the can and-score!-it’s a handy football-themed utensil holder for your Super Bowl party!

football-party-utensil-holder

Visit Drugstore Divas to get a full tutorial for this fun project.

DIY Concrete Dining Set

Aimee blogs at The Crazy Crafty Lady. There, she explains that the mismatched and worn-out dining set that she had really wasn’t her style. But with two year old twins, this stage of her life is not the one in which she is going to be investing in fine furniture. Instead, she decided to restyle the table that she had.

mismatched-dining-set

The first step of this project was to sand away the old finishes on the table, chairs, and bench. Next, Aimee stabilized the tabletop with additional brackets. Why? Because to really change things up, Aimee coated the tabletop with a concrete finish. With the rest of the table and the seating painted a bright white, this dining set looks brand new and so very stylish!

concrete-topped-dining-set-makeover

Find out more about this amazing makeover at The Crazy Crafty Lady.

Storage Trunk Makeover

“My brother found this old trunk in his attic and wanted me to work my magic on it,” Bre begins her story. “I wanted to keep most of the original character but it needed some updates as well.” She shares the process at Brepurposed.

vintage-storage-trunk

Bre took the project in hand and really accomplished her goal to maintain the trunk’s vintage loveliness while refreshing its look. “Some fresh stain on the wood panels, mismatched leather belts and gold metal accents brought this guy back to life,” she explains. “A fresh coat of paint and some fun wallpaper made the inside usable again. It was the perfect Christmas present for him!”

storage-trunk-makeover

Check out the full makeover at Brepurposed.

DIY Tree Stump Planter

“I had a beautiful, tall tree stump that is perfectly capable of standing up on its own, but just didn’t fit in my home except for this corner,” explains LZ of The Summery Umbrella. She decided that as much as she liked that stump, it needed a little somthing to be more visually interesting.

tree-stump

LZ gathered a few things from around her house, like this metal basket that used to be a candle holder. She attached the basket onto the top of the stump with a couple of screws, so that it couldn’t fall off easily. Then, LS filled the basket with evergreen boughs and pine cones for some wintry decor. Way cool!

tree-stump-planter

Make sure you click over to The Summery Umbrella to get all the details on this rustic planter.

Swing Arm Lamp Makeover

At Inspiration for Moms, Laura has been working on a spruce-up of her sons room. Wanting to create a reading nook, she’d selected the bed as the perfect spot, but needed better lighting. Laura almost shelled out money for a set of new sconces, but remembered just in time that she’d be removing the wall lamps in her master bedroom for an upcoming remodel.

swing+arm+lamps+before

The wall lamps that Laura had needed bit of an update before she could install them in her son’s room. She spray painted the metal fixtures silver. She had new lampshades, but since they were plain white, Laura spray painted them red to match the elements in her son’s room. They turned out great!

painted-swing-arm-lamps

Get all the details on this makeover at Inspiration for Moms.

Pretty Settee from a Crib

I’ve featured quite a few projects here at Roadkill Rescue that involve cribs being turned into benches. This one by Sara of Thrifty Treasures, however, takes this concept to a whole new level. She transformed crib parts into a settee with some serious style credentials.

crib-sides

Inspired by the curved edges of a spare footboard that she had on hand, Sara decided that instead of building a traditional bench from her stranded crib and bed pieces, she would make an upholstered settee. Paint, some pretty wood embellishments, and upholstery went into the makeover. The results are lovely, don’t you think?

settee-gray-white-DIY

Head over to Thrifty Treasures to view the full tutorial for this project.