Headboard from Reclaimed Fence

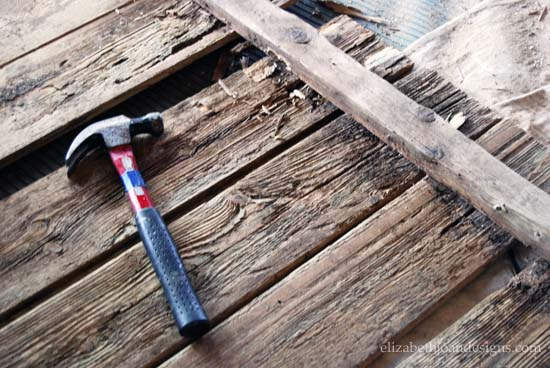
The talented Emily is showing off a fabulous new headboard made from reclaimed wood over at Elizabeth Joan Designs! She “spotted an old 6′ stockade fence tossed to the curb” one night and knew she’d found the perfect piece to complement her son’s bed.

stockade fenceAfter taking the fence apart and removing lots (and lots and lots) of nails, Emily sanded and stained the boards, then added a protective finish. She screwed several boards to the back of the planks for stability and for attaching the hanging hardware. And then she accidentally ran the headboard over with her car, which as we all know is the preferred way to add character. As you can see, the final result is amazing, tire marks and all!

reclaimed wood headboard

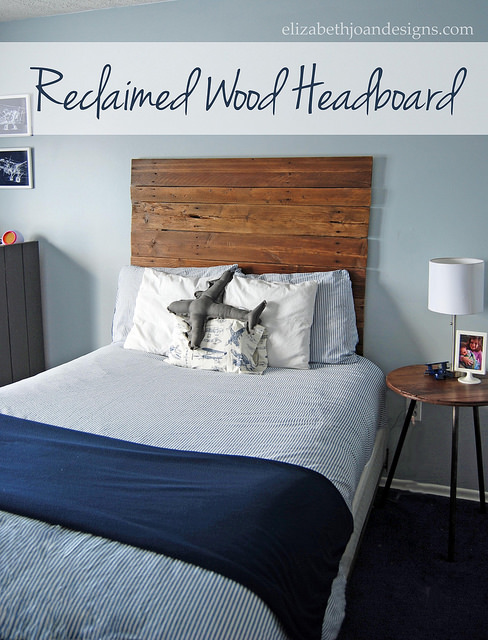
To see the step-by-step instructions, go to Elizabeth Joan Designs.

From Doomed Dresser to Side Table

Jessica is sharing a fast and dirty side table project at Live Randomly Simple. While scoping out a soon-to-be-demolished house, she found an antique dresser with beautiful drawers that were “dingy, dirty, scratched and long forgotten about.” The drawers escaped the wrecking ball and came home with her.

antique-dresser-drawer
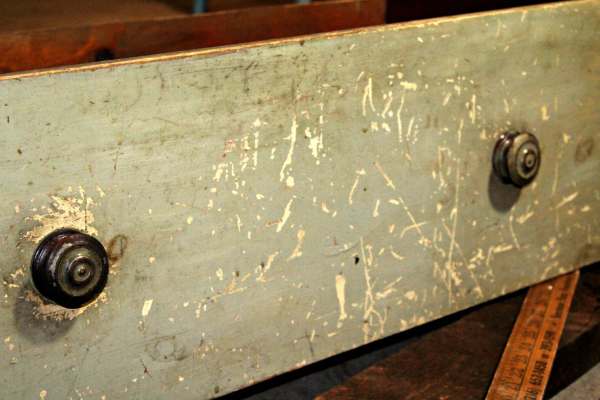
A couple of weeks later, Jessica realized that her shabby chic bathroom would be the perfect spot to feature one of the drawers. She decided to create a side table to hold bathroom supplies. She fashioned table legs by cutting down support beams she’d salvaged from the house’s attic, then screwed them into place. In less than thirty minutes, Jessica became the proud owner of this rustic piece of awesome!

DIY-Drawer-Side-Table 
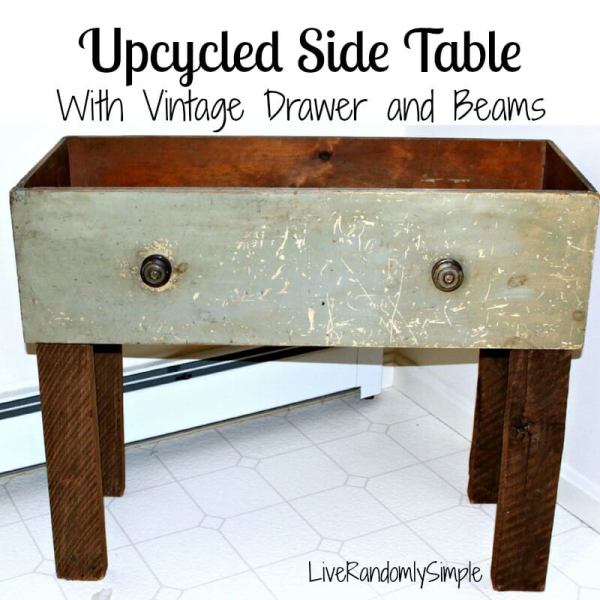
Check out her step-by-step instructions at Live Randomly Simple.


Toothbrush Holder from the Wild Side

Here’s a quick and easy project for anyone who has access to animals. That would be wood or plastic animals, not the real thing-you don’t want to drill holes in those! Anyway, Betsy from Happily Ever After Etc. came up with this project, and while she purchased her animal from Amazon, you can find similar animals in toy bins and garage sales across America. Look around-you might find one in your own house!

elephant-wood

Betsy started this project by painting her wooden elephant white. Next, she drilled a couple of holes big enough to fit a toothbrush into the back of her wooden elephant. Once the holes were drilled, Betsy touched up the paint around them and just like that, she had an adorable new toothbrush holder for her bathroom!

diy-elephant-toothbrush-holder

Check out this project and others at Happily Ever After Etc.

Wood Scrap Heart

Deb from Lake Girl Paints sees the wood scraps in her garage as a challenge rather than clutter! She’s using them to create some fabulous “February Door Decor” that would look great any time of the year. lath-boardsDeb’s project is a great way to solve the “What do I put on my door after Christmas?” conundrum! She cut her heart shape out of plywood, then “laid pieces of lath and fence picket across the top.” Deb used an adhesive and nails to keep the boards in place, then trimmed the edges to line up with the plywood heart. A brown paint wash and some colors dragged across the strips completed the look. I’m definitely a fan!

mixed board hanging heartTo see detailed instructions, check out Lake Girl Paints.

Chalk Paint Treatment for Curbsite Hutch

Sondra Lyn of Sondra Lyn at Home has her husband to thank for this brilliant curbside find. He spotted this hutch one night while walking the dog and immediately took her out to see it. Once they lugged it home, the fun began!

Wooden-curbside-hutch

Sondra Lyn created her own chalk paint, which went on beautifully. (As you can see, she left the inside of the hutch and the top of the buffet base alone.) She distressed lightly with a sanding block and then switched out the wooden knobs for gorgeous brass pulls and glass knobs. I’m pretty sure Sondra snagged two keepers here (the hutch and her husband)!

White-Chalk-Painted-Hutch
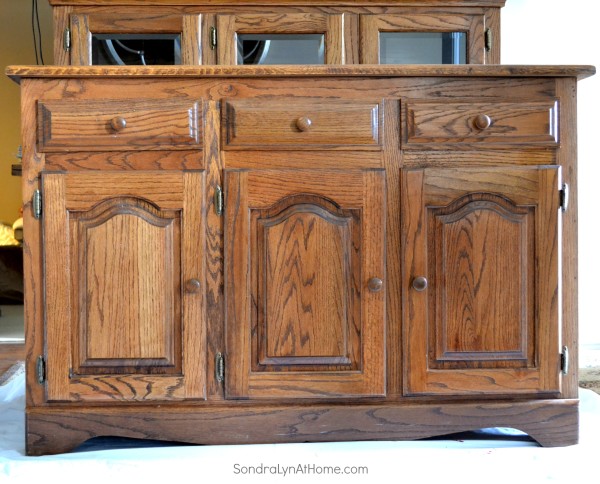
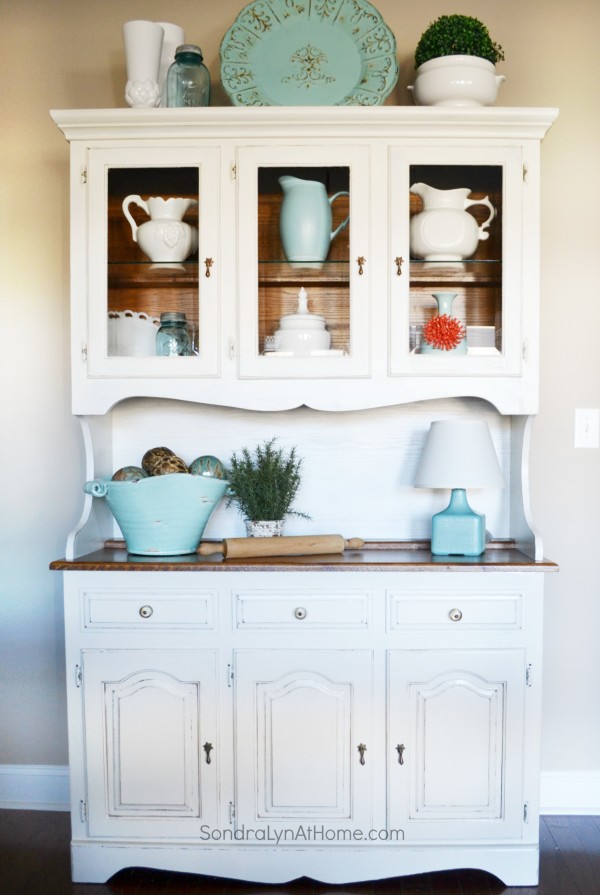
You can read more about Sondra Lyn’s makeover (and get her DIY paint recipe) at Sondra Lyn at Home.

Displaying Children’s Artwork

Raise your hand if you have a stack of children’s artwork in your home that you can’t bear to part with…but you don’t have nearly enough refrigerator space to put on display. Ummmhmmm, yep, that’s what I thought: anyone with kids or grandkids has their hands up high in the air! Well, Jacque from The DIY Village has a terrific idea that may help you save fridge space and show off some of that art you are so proud of.

finger-painting

Jacque’s project started with a little fingerpainting. After letting her toddler daughter find the joy of smearing paint onto paper with her fingers, Jacque let the painting dry. Once dry, she cut it into tiny squares. Jacque glued the squares onto another sheet of paper in a heart shape, using the colorful swirls of her duaghter’s painting to create a mosaic effect. She framed the heart and hung it on the wall. Adorable!

child-finger-painting-art-heart

For a full tutorial of this project, visit The DIY Village.

So Much Nature Love in this Heart

Emily from Table & Hearth share a tutorial for this neat wall hanging at Making it in the Mountains. She made it using some basic craft supplies and some of her favorite things collected from nature: driftwood and acorns.

driftwood-acorn-yarn

For this project, Emily used a lovely driftwood branch as her starting point. From the branch she hung acorns and beads using strands of yarn. She selected yarn in variating shade for an ombre effect, and touched up the acorns with gold paint for a bit of glam. The acorn beaded stands hang at different lengths so that when it is hung on the wall, the acorns form a heart design. Isn’t that so cool?

driftwood-heart-wall-hanging

Find out how Emily turned a fallen branch and gathered acorns into art by visiting Making it in the Mountains.

Shutter Organizer with Knobs

Chas from A Woman’s Haven had an assortment of knobs left in her craft stash after hosting a crafting event. She also had some old shutters.

leftover-knobs

Combining the two very different things produced something beautiful-and helpful-for Chas’s home. She painted the shutter a pretty shade of duck egg blue. Once the paint had dried, she attached all of the knobs in a row along one edge of the shutter. Hung vertically on her wall, the shutter now provides plenty of “hooks” for hanging and organizing items by the door. Great idea!

shutter-organizer

Visit A Woman’s Haven to find out more about this repurposing project.