Cool Outdoor Pallet Bar

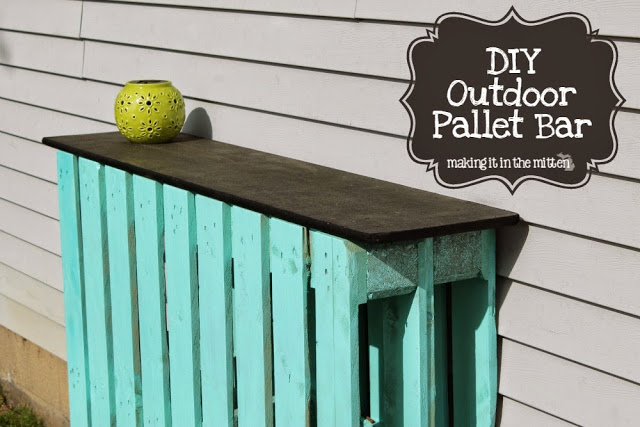
Today’s rescue comes from Melanie of Making it in the Mitten. She loves entertaining outside during the summer, and this year she decided she “needed a space to place food and beverages while we are outside.” Her husband grabbed a couple of free pallets from work, and they used them to build an outdoor bar!

wood-pallet-before

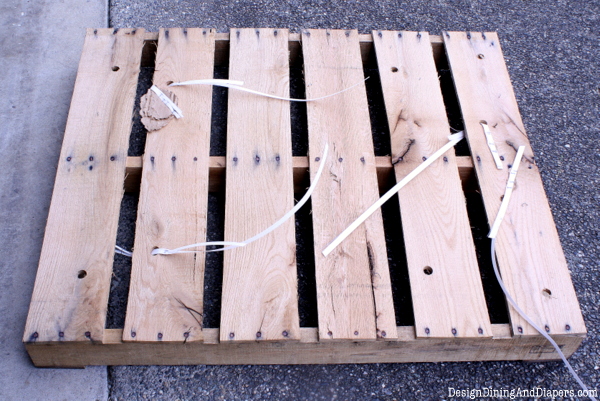
She spray painted both pallets in a cool aqua shade, then screwed them together. A piece of scrap wood became the tabletop, which crafty Melanie painted with chalk paint so she’ll have the option to “write fun things or to label specialty drinks.” Now that it’s finished, Melanie says, “It was a pretty simple project, but I love the final result!”

diy-outdoor-pallet-bar

To read more about this project, check out Making it in the Mitten.

Metallic Mermaid Hair Clips

Ashley from Hello Nature loves combing the beach for interesting, beautiful seashells. Her growing collection has inspired “a nautical hair accessory that’s perfect for Summer!”

seashells

She says these clips “are easy to make using seashells, a metallic paint marker and glue.” After painting both sides of the shell and letting it dry, simply glue on the clip and you’re ready to go! Ashley likes to use alligator clips for one shell, but says another option would be to use a larger clip and glue several smaller onto it. As for styling it, she says, “I like to braid a small section of my hair and clip my seashell hair clip in for a breezy, beachy, mermaid look.” If you’re going for beach hair, this sounds like an awesome way to do it!

To see the complete instructions and the list of products Ashley uses, visit Hello Nature.

This Bundt’s NOT in the Oven

Bonnie from Our Secondhand Home is back with a new makeover! Last year we featured her bundt pan planter and now she’s got a new pan and a new idea. This time her attention is turned to the sewing room-specifically some “pretty in pink” ribbon storage!

The pan was in great shape, but Bonnie didn’t love the green color. Instead she gave it three coats of pink spray paint, then popped in her ribbon collection. “It’s kind of funny that it holds all of the spools of ribbon that I own.” Hey, I call that a match made in (pink) heaven!

Read more about this quick and easy upcycle at Our Secondhand Home.

Finish Your Cereal and Make Mini Pinatas

Heather from Woods of Bell Trees has a great idea for using up cereal boxes! She’s making a bunch of darling mini pinatas in the shape of strawberries: “a very simple, easy peasy shape.” These would be a huge hit as party favors and party decorations.

For each pinata, Heather cut out two strawberry shapes, then strips to form the sides. She used packing tape to tape the top, bottom, and sides together (making sure to fill the pinatas before she tapes on the strawberry-shaped “lid”). She wrapped the pinatas with strips of overlapping crepe paper, then used some green strips for the top. I’m maybe squealing a little bit at how cute these are.

Find out how to make your own at Wood of Bell Trees.


Prepping for a Well-Stocked Summer

Erin a HUGE fan of summer, and loves that it’s time to “change out the backpacks and lunchboxes for beach towels and sunscreen.” This year she is making a “Summer Basket” to keep in her mudroom. The medicine cabinet “is upstairs, and not so convenient for dripping wet children coming in from the slip-n-slide for a band-aid.” An old wire basket is volunteering for duty at The Organized Life.

Erin spray painted her basket a summery lime green. She says, “I also added a chalkboard sign and a cardboard bottom covered in fun wrapping paper (and contact paper to keep it water resistant), so things wouldn’t fall through.” Erin stocked her kit with sunscreen, bug spray, aloe vera gel, and supplies for treating summer scrapes. Such a smart idea-what would you put in yours??

To read more about this project and see links to DIY recipes, visit The Organized Life.

Taking the 70s out of the Dresser

Taryn inherited a dresser with great clean lines that was the perfect size for her daughter’s room. Unfortunately, it “was clearly a victim to some serious orange spray paint in the 70’s.” What’s a gal to do? At Design, Dining, and Diapers she’s working a pastel-friendly transformation with the help of chalk paint powder!

Taryn sanded the dresser to strip off the orange paint, then stained it. She mixed the chalk paint powder “into a quart of ‘remnant latex paint’ that I picked up from the hardware store for $2.50. . . . It’s a light gray with a little bit of a blue undertone.” After dry-brushing it on, Taryn can honestly say “THIS STUFF ROCKS MY SOCKS OFF.” The final touch came in the form of pink drawer pulls, chosen by her little girl. Looks like mama and daughter both have great taste!

To read more about this makeover, visit Taryn at Design, Dining, and Diapers.


Choose Your Own Bathtub Tray Adventure

Larissa just completed a beautiful farmhouse-style bathroom update and got lots of compliments on her fabulous bathtub tray. So she’s sharing the tutorial at Prodigal Pieces, where she’s showing us how to create not one but two different styles (modern and rustic), both perfect for that long luxurious soak!

Larissa used scrap wood from her stash, cut it down to the right size for her tub, and then cut small slats to go on the underside of the board. She drilled the slats onto the board, flipped it over, and attached 4″ long handles that “came off of a gorgeous stash of wooden windows” Larissa recently parted with. She says, “For one of my trays, I am painting it a dark charcoal semi-gloss . . . and the other I’m using a weathered look stain.” Here’s the modern tray-I know it’s inspiring me to treat myself to a nice spa day at home!

To see the tutorial (and pics of the rustic tray) head on over to Prodigal Pieces!

Gold & White Globe

Curly Craft Mom Carrie’s son “had this old globe laying around that he never used,” so she snagged it to work into her home office decor. Of course, she couldn’t resist glamming it up with a makeover first!

Carrie applied two coats each of primer and white paint to the globe. Then she got out her awesome new craft cutting machine and software to design and print out a vinyl monogram in gold. Carrie applied the monogram to the globe, working carefully from one side to the other to keep the vinyl from creasing. She’s so proud (and she should be!) of how great this turned out, and how “the colors work wonderfully with the rest of the items on my desk!”

Find out more about how Carrie created her globe at Curly Crafty Mom.